
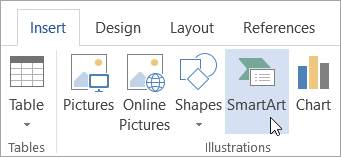
- On the Insert tab, in the Illustrations group, click SmartArt.
- In the Choose a SmartArt Graphic dialog box, click the type and layout that you want.
- Enter your text by doing one of the following:
- Click [Text] in the Text pane, and then type your text.
- Copy text from another location or program, click [Text] in the Text pane, and then paste your text.
Notes:
- If the Text pane is not visible, click the arrow control on the left side of the SmartArt graphic.
- To add text, like a title, in an arbitrary position close to or on top of your SmartArt graphic, on the Insert tab, in the Text group, click Text Box to insert a text box. If you want only the text in your text box to appear, right-click your text box, click Format Shape or Format Text Box, and then set the text box to have no background color and no border.
- Click in a box in the SmartArt graphic, and then type your text. For best results, use this option after you add all of the boxes that you want.
Add or delete shapes in your SmartArt graphic
- Click the SmartArt graphic that you want to add another shape to.
- Click the existing shape that is located closest to where you want to add the new shape.
- Under SmartArt Tools, on the Design tab, in the Create Graphic group, click the arrow next to Add Shape.

If you don’t see the SmartArt Tools or Design tabs, make sure that you’ve selected the SmartArt graphic. You may have to double-click the SmartArt graphic to open the Design tab.
- Do one of the following:
- To insert a shape after the selected shape, click Add Shape After.
- To insert a shape before the selected shape, click Add Shape Before.
Notes:
- To add a shape from the Text pane, click an existing shape, move your cursor before or after the text where you want to add the shape, and then press ENTER.
- To delete a shape from your SmartArt graphic, click the shape you want to delete, and then press DELETE. To delete your entire SmartArt graphic, click the border of your SmartArt graphic, and then press DELETE.
- To add a shape like a callout or a line, see Add shapes.
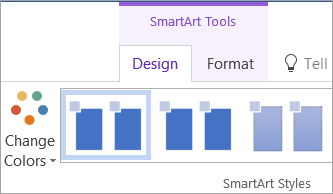
Change the colors of an entire SmartArt graphic
You can apply color variations that are derived from the theme colors to the shapes in your SmartArt graphic.
- Click your SmartArt graphic.
- Under SmartArt Tools, on the Design tab, in the SmartArt Styles group, click Change Colors.
If you don’t see the SmartArt Tools or Design tabs, make sure that you’ve selected a SmartArt graphic. You may have to double-click the SmartArt graphic to open the Design tab.
- Click the color variation that you want.
Apply a SmartArt Style to a SmartArt graphic
A SmartArt Style is a combination of various effects, such as line style, bevel, or 3-D, that you can apply to the shapes in your SmartArt graphic to create a unique and professionally designed look.
- Click your SmartArt graphic.
- Under SmartArt Tools, on the Design tab, in the SmartArt Styles group, click the SmartArt Style that you want.
To see more SmartArt Styles, click the More button.
Tips
- To resize your entire SmartArt graphic, click the border of your SmartArt graphic, and then drag the sizing handles in or out until your SmartArt graphic is the size that you want.